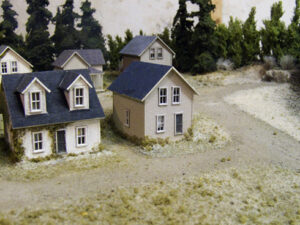
Having endured the agony of building my own turnouts for the now-defunct UUR (Unfinished & Undecided Railway), I was looking forward to actually laying down some prefab rail and turnouts. In order to accommodate the small size of the EAS, track work was designed around PECO #4 turnouts ‘ their small radius and curved points allow for tighter track arrangements. The other reason I chose PECO turnouts was that I already had a small number on hand, the result of a false start several years ago. The track is all ATLAS Code 80 flex track; the only track my local (and sparsely stocked) hobby shop carried.
I tried a new technique for laying the track that I had read about, which involved spreading a thin layer of caulking on the roadbed as an adhesive. I would highly recommend this method to anyone, as it was the easiest and slickest technique I’ve ever used.
Working in a two-foot section, I applied a small bead of caulking down the centerline of the roadbed and then spread the bead into a paint-thin coating with my finger. Next, I simply pressed the track into the caulking and where necessary, added a pushpin to secure the rails until the caulking had dried. The slick part about this technique was that as I laid the rails around curves, the caulking actually held the track in place without the push pins. As such, it was possible to bend the track in a nice even curve, and then push it into the caulking to hold it in place. I still elected to add the push pins.
Along the way, I discovered a few important things:
- Don’t apply too thick a layer of caulking as it will squeeze up between the ties and cause problems when you ballast.
- Wiggling the trackback and forth excessively while attempting to position it in the caulking will again force it up between the ties.
- Don’t apply any caulking beneath the point on turnouts.
I also took the opportunity to install a couple of uncoupling magnets, for when I actually get around to installing magnetic couplers on my fleet of cars. I purchased some ceramic magnets at Radio Shack, which appeared to be the same thickness as the roadbed, as well as the same width. The magnets were a little thick, so I shaved down the plywood about 1/16 of an inch under each magnet, so that once installed they were level with the top of the roadbed.
I opted to leave the track hanging over the overpass as I haven’t decided what type of bridge/tunnel configuration I’m going to use!